HOW TO CREATE AN APPOINTMENT
Create an appointment
- Go to Settings
Navigate the Calendars, then click the 'New Calendar'
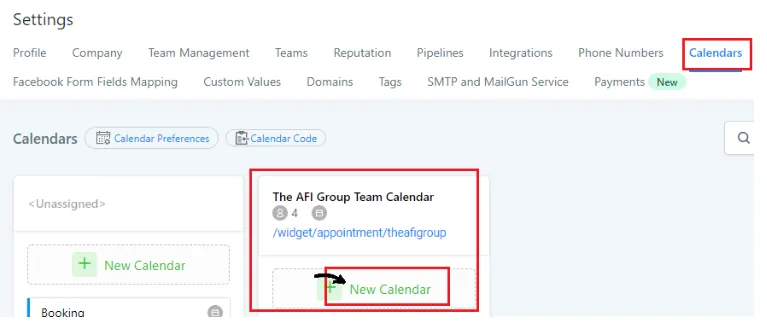
- Set up the Team and Event Setup tab
To create an appointment, you can fill out the information on the first tab to set up an appointment.
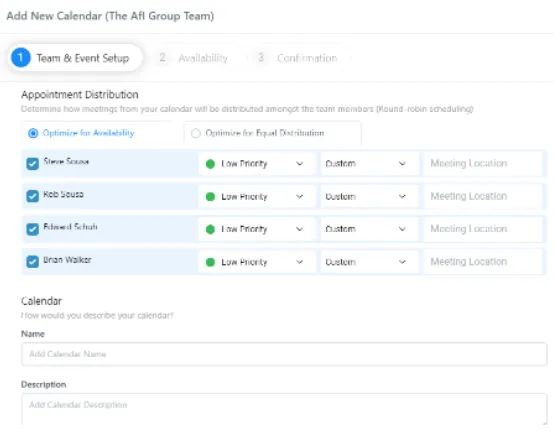
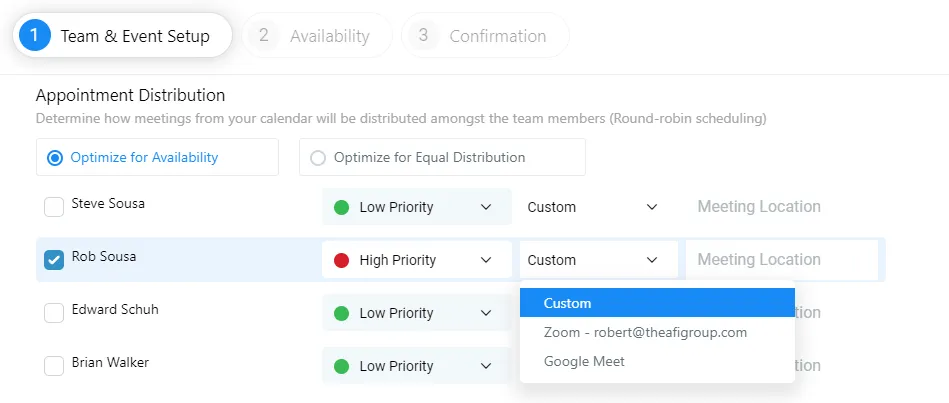
You can check ✅ who is in charge of the appointment and choose High Priority. There’s a list of fields that will appear on this Appointment Distribution that you will choose where the meeting location connects.
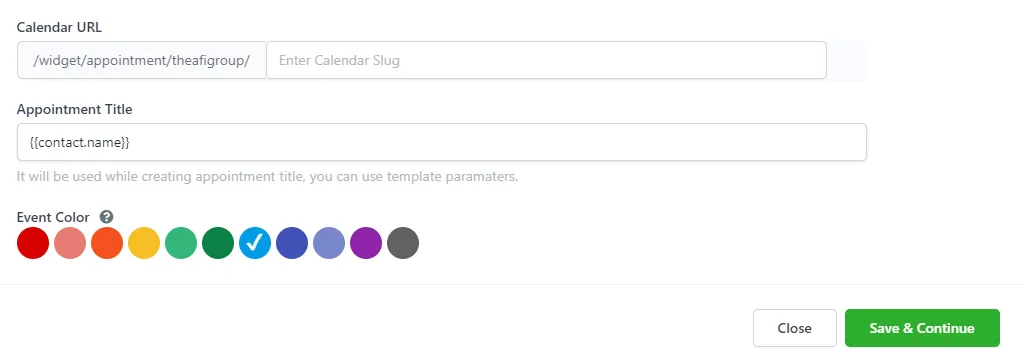
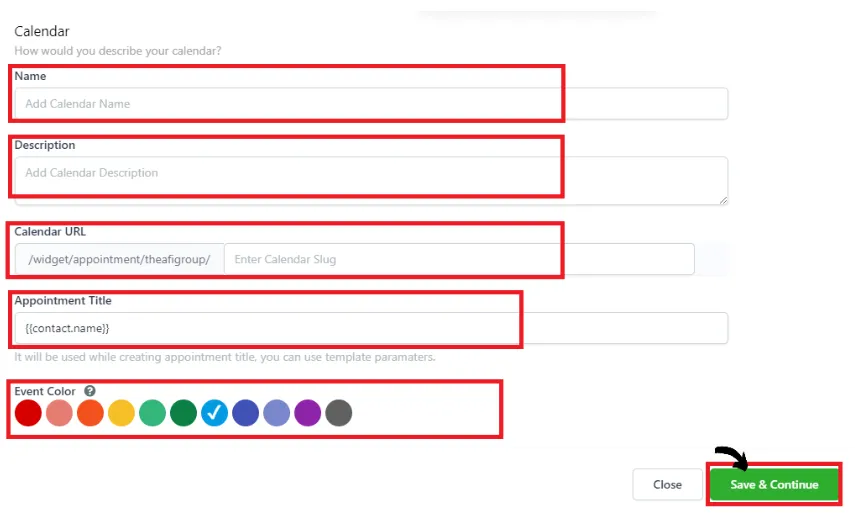
You should fill out what Calendar Name, Description, and Calendar URL for this appointment.
In the Appointment Title, put a custom value like to automatically determine the name who’s your appointment with.
You can choose the Event Color then click the Save and Continue to do the next step or page.
- Set up the Availability in your Appointment.
To create an appointment, you can fill out the information on the first tab to set up an appointment.
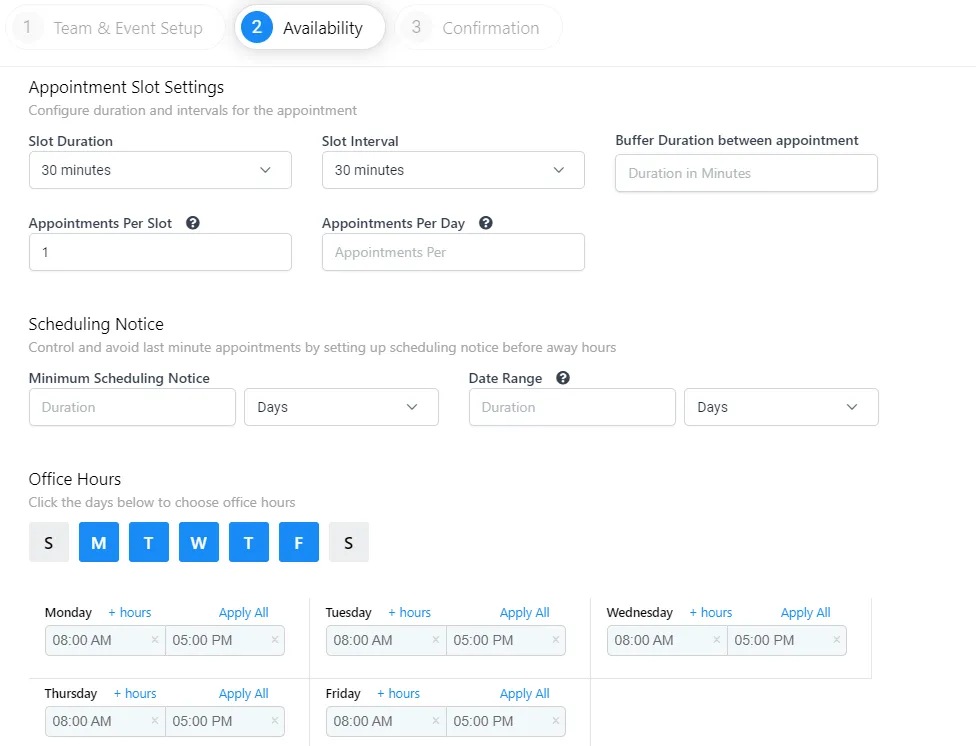
First, Set up your Appointment Slot Settings.
Select the field of how long the duration and how long the interval of the appointment is. And give some buffer time to prepare for a wrap-up booked Appointment. And you can put also how many appointments per slot/day do you want.

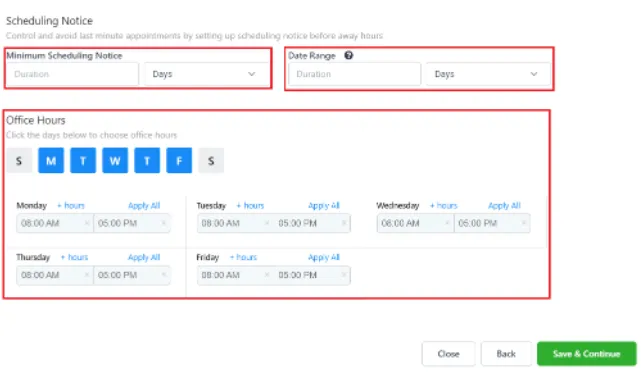
Next, Set up the minimum Scheduling Notice for the last-minute appointment. You can also put the Date Range of how many days they can schedule with you. Set up the Office Hours, set up your Office Hours or your Available hours and days. If your available time is the same every day, you can select Apply All.
Then select Save & Continue.
- Set up the Custom Form in Confirmation
You are going to choose if you have a custom form that they will use to fill out. And then you can click the box to ✅ check sign if you want to notify on that or not.
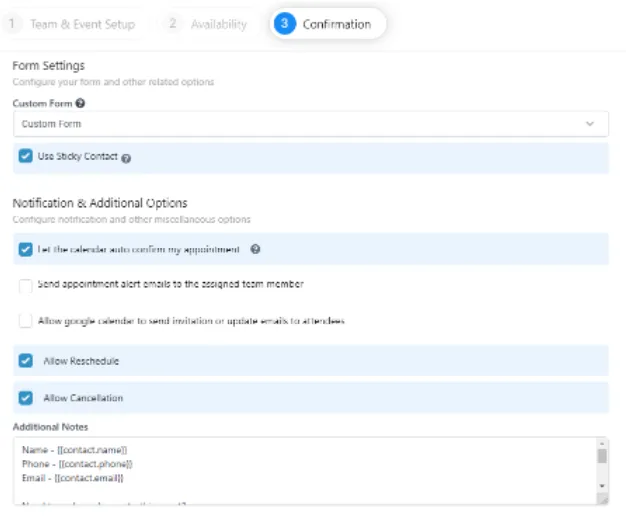
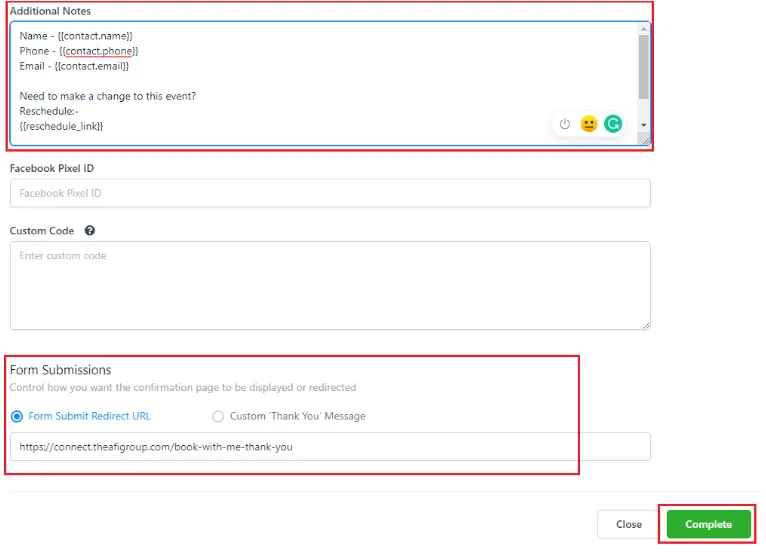
You can add the template that you want in the Additional Notes. And you can create a template for Thank you Message or create a landing page for the Thank You Page. Then select Complete to save your Appointment.
Email us: [email protected]
Meet with Rob: www.schedulewithrob.com
Meet with the AMH Team: www.amhsupport.com


